Scope of Rebar Binding Process Application
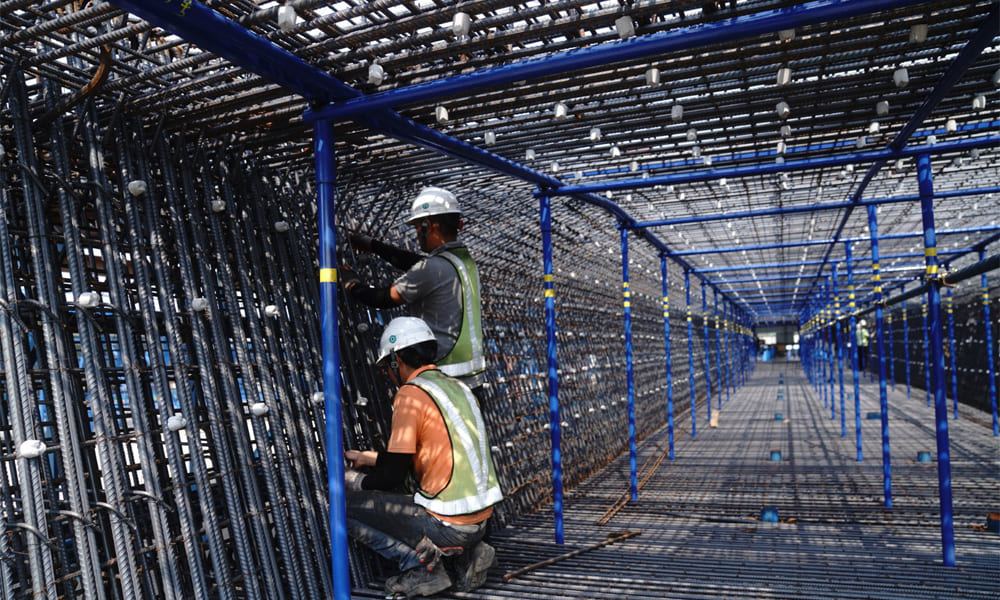
This process standard applies to various components of pile foundation in bridge engineering, including:
- Cap
- Pier stud
- Cap beam
- T beam
- Other ground reinforcement binding projects
Preparation of Major Rebar Binding Process Application Standards and Specifications
1 Industry Standards
- Technical Code for Highway Bridge and Culvert Construction: JTJ 041-2000
- Highway Engineering Quality Inspection and Evaluation Standards: JTG F80/1-2004
2 National Standards
- Hot-rolled Round Steel Bars for Reinforced Concrete: GB 13013-91
- Hot-rolled Ribbed Steel Bars for Reinforced Concrete: GB 1499-1998
- Mild Steel Hot-rolled Disc Rod: GB 701-1997
Preparation for Construction
1 Technical Preparation
- Drawings and Design: Familiarize yourself with construction drawings and prepare the organizational design for reinforcement binding.
- Steel Bar Cutting: Cut steel bars according to the drawings’ specifications.
- Technical Disclosure: Provide a written technical disclosure to each reinforcement team.
2 Preparation of Materials
- Reinforcing Bars:
- Ensure that reinforcing bars have factory certificates and inspection reports.
- Inspect for rust and oil stains; sample for mechanical properties retest as required.
- Iron Wire:
- Use 20~22 gauge iron wire (for burnt wire) or galvanized iron wire.
- Cut wire to meet usage requirements.
- Cushion Block:
- Select cushion blocks based on the protective layer thickness. Use cement mortar blocks with a strength grade matching the concrete design strength.
- For pile foundations, use 3 cm or 5 cm thick plastic cushion blocks, ensuring sufficient compressive strength.
- Steel Pipe:
- Use as an auxiliary material for binding and hoisting steel skeletons. Ensure the frame is erected securely.
3 Preparation of Implements
- Main Tools: Rebar hooks, crowbar, wrench, wire brushes, handcart, chalk, rulers, etc.
4 Operating Conditions
- Site Preparation:
- Clean and level the steel bar stacking and processing site. Stack bars according to specification and numbering.
- Rust Check:
- Inspect bars for rust and remove it before transporting to the binding site.
- Drawing Familiarization:
- Check specifications, shape, quantity, and size of processed steel bars against design requirements.
- Inspection:
- Ensure bridge deck pavement mesh dimensions and welding quality are verified before use.
- Binding Sequence:
- Determine the sequence of steel bar placement based on design and process standards. Make technical disclosures to the team.
- Positioning:
- Use chalk to mark the position of main reinforcement on the bottom mold and reserve the protective layer thickness using cushion blocks.
Construction Operation Rebar Binding Process Process
1 Pile Foundation Reinforcement Binding Process
1.1 Process Flow
- Steel Bar Welding: Continuously weld the main reinforcement.
- Stiffener Ring Processing: Mark the position and weld stiffener rings.
- Spiral Bars: Winding and lashing.
1.2 How-to
- Welding and Stiffener Processing:
- Use flash butt welding or arc welding for main reinforcement. Ensure stiffener rings are round with no elliptical distortion.
- Position Line:
- Draw stiffener circle positions based on drawing requirements. Ensure 5 cm from the bottom edge of the main reinforcement.
- Welding Stiffeners:
- Spot weld stiffeners ensuring full, uniform welds with no burns or defects.
- Spiral Bars Binding:
- Tighten spiral bars and main bars without gaps. Bind intersections firmly and use figure-eight buckles if needed. Add concrete cushion blocks to the reinforcement cage.
2 Cap Reinforcement Binding Process
2.1 Process Flow
- Pile Head Reinforcement: Adjust and clean reinforcement.
- Cushion Cap Reinforcement: Process and form parts as per design.
- Mark and Bind:
- Mark and bind main reinforcement on the cushion layer, bottom plate reinforcement, pier column reinforcement, and roof reinforcement.
2.2 How-to
- Pile Head Adjustment:
- Clean sludge and straighten reinforcement. Adjust spacing to meet design requirements, generally bending outward at 15 degrees.
- Cap Reinforcement Processing:
- Process steel bars according to design drawings ensuring cleanliness and straightness.
- Mark Main Reinforcement:
- Mark positions on the cushion based on spacing from the drawings.
- Binding:
- Place cushion blocks according to protective layer thickness. Ensure lap lengths and positions meet specifications. Use figure-eight binding where applicable.
- Pier Column Reinforcement:
- Ensure verticality and positioning of pier studs during hoisting.
- Roof Reinforcement:
- Ensure even spacing and proper binding of horizontal ribs, using full gang binding and figure-eight buckles.
3 Pier Stud Reinforcement Binding Process
3.1 Process Flow
- Welding Main Reinforcement: Ensure proper welding connections.
- Draw Stirrups: Mark stirrup spacing lines on main reinforcement.
- Set Stirrups: Position stirrups according to spacing requirements.
- Tie Stirrups: Securely bind stirrups to main reinforcement.
3.2 How-to
- Main Reinforcement Connection:
- Ensure the connection mode meets design requirements.
- Stirrup Spacing:
- Draw and calculate stirrup spacing based on drawings.
- Set and Tie Stirrups:
- Position stirrups and tie securely ensuring no displacement of protective layer hooks.
- Circular Pier Stud:
- Refer to pile foundation reinforcement binding if pier stud is circular.
4 Cap Beam Reinforcement Binding Process
4.1 Process Flow
- Weld Main Reinforcement: Continuously.
- Draw Stirrups: Mark spacing on the main reinforcement.
- Set Stirrups: Position and bind stirrups.
- Prestressed Bellows: Thread and seal.
- Hoist: Lift into place.
4.2 How-to
- Main Reinforcement Welding:
- Ensure connections meet design requirements.
- Draw Stirrups:
- Mark stirrup positions on the main reinforcement.
- Set and Tie Stirrups:
- Place and bind stirrups ensuring proper length and quantity.
- Prestressed Bellows:
- Locate, weld positioning reinforcement, and thread bellows.
- Hoisting:
- Use cranes to lift and place the cap beam, removing shelf pipes.
5 T Beam and Box Girder Reinforcement Binding Process
5.1 Process Flow
- Bottom Plate Binding: First, then web reinforcement, ends, middle beam, and roof reinforcement.
5.2 How-to
- Bottom Plate:
- Draw ground spacing, place and bind main reinforcement with horizontal ribs.
- Web Reinforcement:
- Ensure proper positioning and binding, with a focus on widening sections.
- End and Middle Beam:
- Bind according to drawing requirements ensuring correct angle and length.
- Roof Reinforcement:
- Ensure even spacing, add reinforcement braces, and tie intersection points.
Rebar Binding Process Quality Standards
1 Raw Materials
- Steel Bar Inspection:
- Perform mechanical property inspections and check product certificates and factory reports.
- Visual Inspection:
- Ensure bars are straight, undamaged, and free from rust or oil stains.
- Special Inspections:
- For brittle or poorly welded bars, conduct chemical composition testing or other special inspections.
2 Steel Bar Processing
- Hooks and Bends:
- Ensure compliance with design requirements for hook sizes and bending.
- Perform inspections based on sample sizes per working shift.
By adhering to these standards, the reinforcement binding process for pile foundations in bridge engineering can achieve high-quality results and ensure structural integrity.
